Overview
This project consists of two python-based applications:
1. Service running on a Raspberry PI Zero and
2. Server that runs on a Linux/Windows server.
The Server application lets the user control and program the Service through a web-based interface.
The scope of the project is to help students learn the basics of the programming language python by programing the sensors attached to the Raspberry PI.
-
Service
The service application is a python 3.x application running on Raspberry PI’s Raspbian operating system. The app itself has two main scopes. One is the control of the various sensors attached to the Raspberry PI and the other is the communication back and forth with the Server app through WebSockets with the help of the Tornado framework.
Tornado is a Python web framework and asynchronous networking library. By using non-blocking network I/O, Tornado can scale to tens of thousands of open connections, making it ideal for long polling, WebSockets, and other applications that require a long-lived connection to each user.
The service was built to be very robust. It can detect faulty sensors and it prevents the user from sending too many consequent requests to the sensors which might otherwise render the device non-responsive. -
Server
The server application is a python 3.x application running on the Django 2 web framework. It can be installed on both Linux and Windows servers and for a smaller number of users it can run from any modern desktop or laptop.
The Server app renders a web user interface that can be accessed from any modern browser. The Server app connects to the Service through WebSockets to display real time sensor data and it lets the user send data to the Service.
Other than giving access to the Raspberry PI’s sensors, the Server’s web user interface lets students create their own profiles and it lets teachers assign each device to the students.
The Server app can be run from the Local Area Network but it can also be installed to and accessed from a remote location like a webserver running on AWS with it’s own domain -
Features
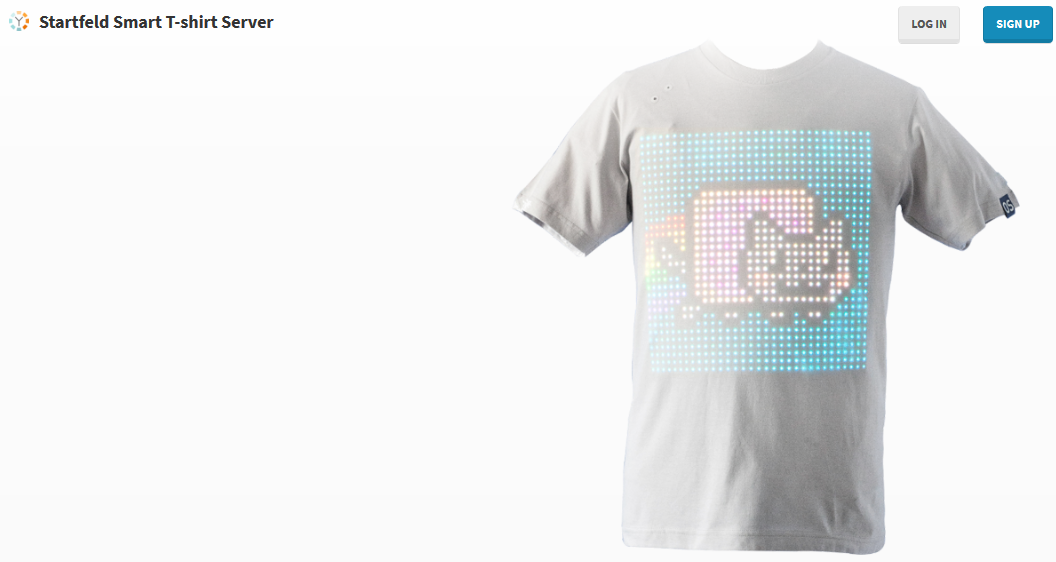
Once both the Server and the Service are up and running, the user interface can be accessed by typing the IP address of the Server the port 8080 (for example 10.0.0.1:8080). This is what the app looks like when we access it for the first time:
The top of the screen contains the navigation bar with the links to all the part of the apps. Those are:
• Home
• Sensors
• Laufschrift
• Blockly -
Sensors
The main Sensors screen displays the realtime data from the user’s connected Raspberry Pi

The Temperature data are always displayed as soon as the device is connected. Since the Color Sensor LED can get hot over time, it has to be manually turned on and off when needed. When it’s turned on the other three fields will start to display the data in real time and the while LED light on the Raspberry PI device will turn itself off -
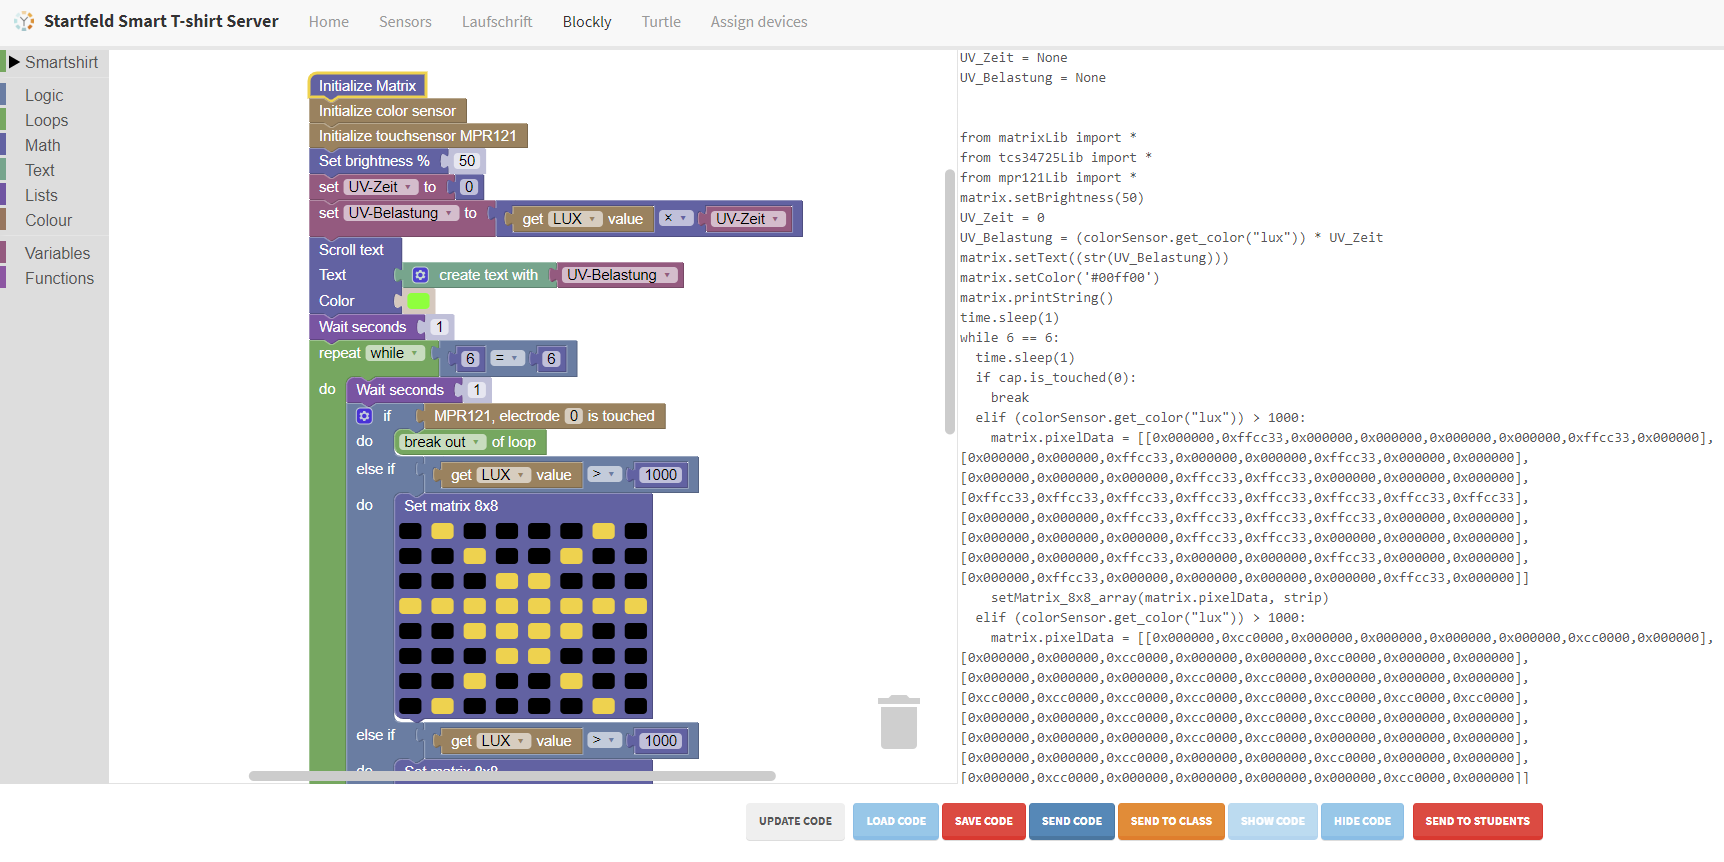
Blockly
The main part of the Server web app is the Blockly page. Blockly allows students to learn the basics of programming by placing visual blocks on the canvas which are translated in real time into python code.
The main part of the Blockly interface it’s the Blockly canvas and the python generated code.
The Temperature data are always displayed as soon as the device is connected. Since the Color Sensor LED can get hot over time, it has to be manually turned on and off when needed. When it’s turned on the other three fields will start to display the data in real time and the while LED light on the Raspberry PI device will turn itself off
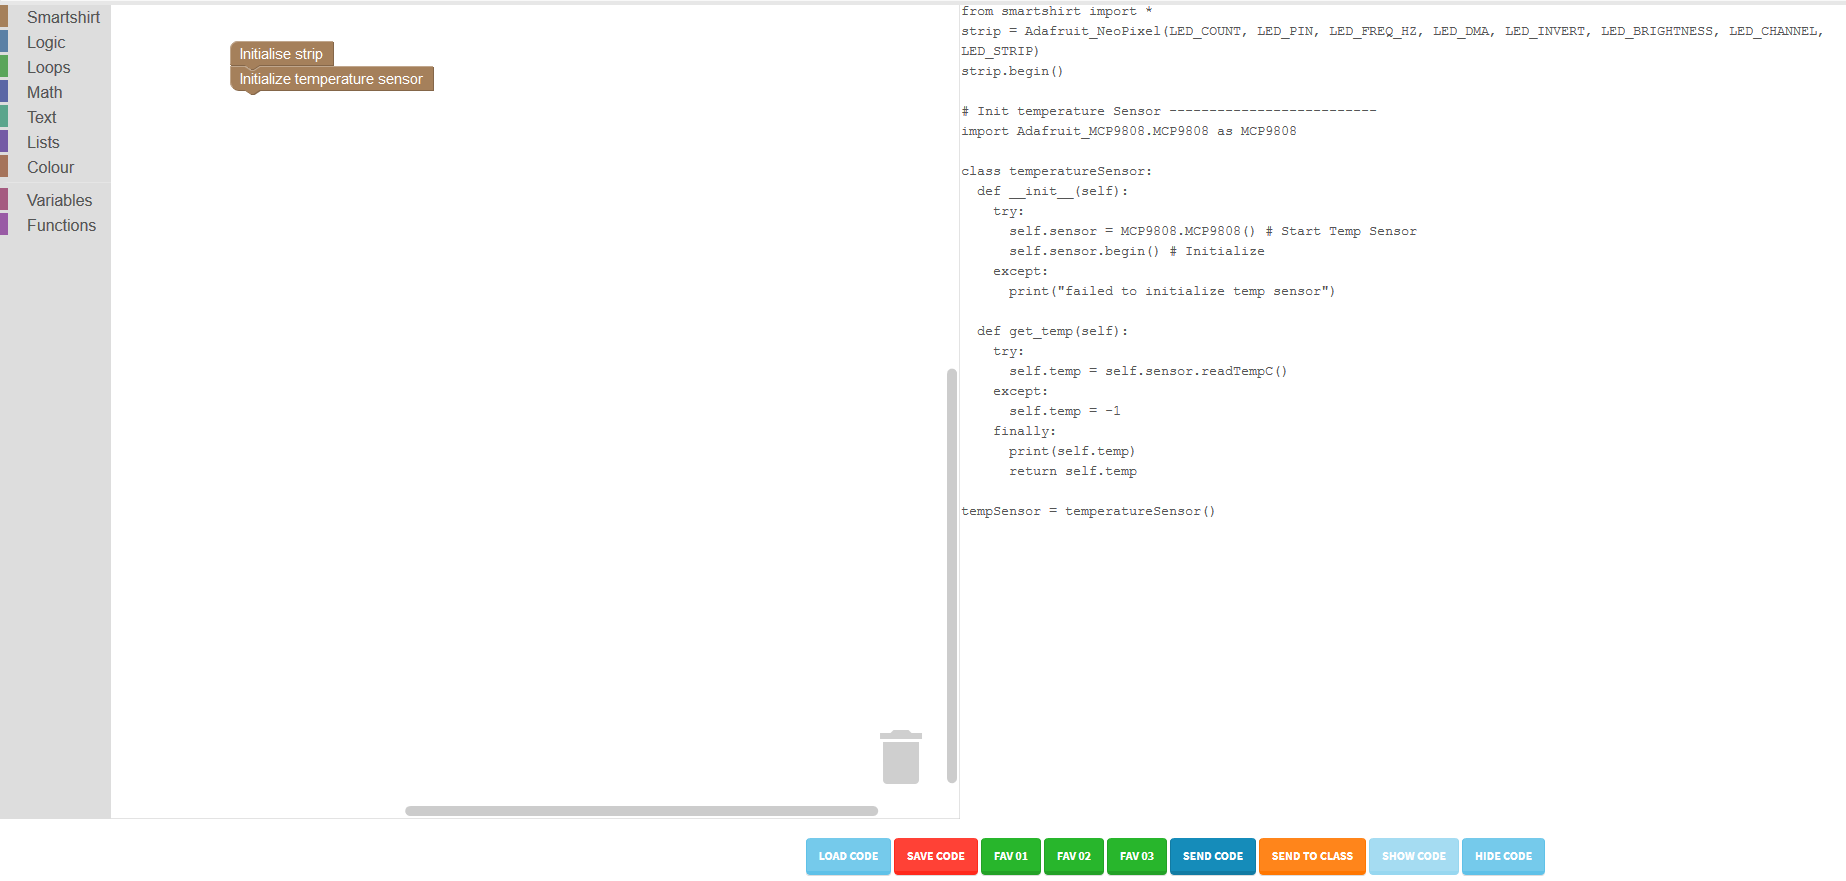
On the far left we have the toolbar divided into categories. The first category belongs to the Smart T-shirt and sensors functionality. The other categories are more general-purpose programming categories. By selecting an element from the left toolbar and dragging it over the canvas, blockly generates python code in real time. Each time a block gets added or changed, the code itself will immediately change.
Blocks can be deleted by either selecting them and hitting the delete key or by dropping them over the trashcan in the bottom right corner of the blockly canvas.
The Smartshirt blockly functionality it’s defined in the blockly.html template inside the Server folder. It consists of an XML element (blockly.html:103) which defines the markup and content of the toolbar rendered on the page and a various javascript functions (blockly.html:720) which define the behavior of each of those blocks. Additional blocks can be added at any moment. -
Classroom Management
Classroom management is done via Admin interface.
By clicking on Blockly blocks it is possible to update, delete and copy existing classrooms as well as manage existing blocks. Full classroom management is described in the documentation section.